Tuesday, July 29, 2008

New Rose stamps!


And here's a card using Kitchen Sink Roses! I'm not going into detail w/ this card. This was for the last of the Dirty challenges! Woo hoo! They are done!
I had to do faux stitching and pink and black. I added the roses only because I was messing around w/ them and then remembered I still had 1 card left!

Thanks for stopping by!
Have a Rose of a day!
Happy Stamping!!!

New Hydrangea stamps!


Woo hoo! I have new Kitchen Sink Stamps!!!! I finally broke down and bought a couple sets! I had to! I was drooling over them for SO long! And then they had a 15% off sale, so that was my sign to head on over and purchase some! I bought the Hydrangea, Rose, and Daisy sets. Seriously, they are a really great deal for all the stamps you get per set! I just couldn't help myself!

Anyway, so, I'm STILL working on those stinkin' dirty challenges! I have 1 left! Oh, I think I'll be able to work on it this afternoon when everyone goes down for a nap! Then I'll be done! And then I can work on today's color challenge. And then work on a gift for my aunt. I totally forgot about her on Mother's Day as she is my Godmother, so I wanted to make her something special. I was going to make her a set of cards. I think I'll do little cards and make a box to put them in. We'll see how much time I have between packing and doing the daily challenges, and all the other stuff I have to do before we leave for the beach!

So, this card was done for a dirty sketch challenge. I didn't do it exactly how they had it. I had to change it just a little bit. I moved the sentiment and added more ribbon than just a strip across. BORING! And I think I forgot a layer behind the hydrangea arrangement. Oh well! Like I care! There's no police that are going to knock on my door and steal my card!

I used French Script for the background, and I stamped it in Basic Brown. The hydrangea's themselves are actually 4 different stamps! Tell me that's not hard to get them centered perfectly to make it look real! When I was done w/ the planter, I was just amazed at how real life it looks! I was so pleased with it! I wanted to just put the planter on the card and be done! Haha! Anyway, I used 4 different shades of blue for the hydrangeas, 4 shades of gray/black for the planter, and 3 shades of green for the leaves. There's a strip of Bashful Blue behind (to comply w/ the challenge). The two circles that are punched are actually both Bashful Blue. I just sponged Night of Navy around the bigger one. The sentiment is stamped in Night of Navy and from Fancy Flexible Phrases. I have cornflower blue ribbon around it, and then had to do some paper piercing (again, to comply w/ the challenge).

I put a piece of vellum behind the arrangement to fade the background out and highlight the arrangement. In my mind's eye, this is supposed to be a window.....

Thanks for stopping by!
Stop and smell.....the hydrangeas!!! ;)
Happy Stamping!!!

Monday, July 28, 2008

A quadruple challenge!

This card was made yesterday for a quadruple dirty challenge! I had to. There was just no way I could do 4 separate cards in just 2 hours, which was all I had today. And I had 6 challenges staring me in the face, so I just decided to combine 4 and knock them off my list! I didn't do a great job, but oh well. When you have family and family commitments, that sometimes gets in the way of crafting! Oh well! I won't have little kids forever!
So, here's the card.


Here are the challenges:
1. Create a scene
2. Stitch
3. sketch
4. bold, bright colors.

Hopefully I created a scene worthy of the challenge. Of course, when children go to the park, you can literally envision popcorn, snowcones and junk food circling their head as they stare in a daze at all the awesome treats and rides that parks have to offer!

And I know, you don't have to tell me, don't quit your day job, or your regular stamping! The stitching is NOT that wonderful! Which is why I refuse to buy a sewing machine. Not only do I not have room in my stamp room for one, but I just know that sewing is not my forte.

I love sketch challenges! I love how different each sketch is. This one is no different! Now, had I had more time, and I still have the rest of the week to do so, I can create something a little nicer. But, I was trying to make it fun! Because I like fun cards! I make enough boring, subtle cards, it's nice to just have fun w/ one!

Bold Brights are quickly becoming my favorite! Well, my alltime favorite color is Tempting Turquoise. I like almost all of the colors, but I love that one most of all! So, I had to include that color when designing this card!

So, hopefully this card is fun and bright and you like it!

Thanks for stopping by!
It's summer! Go to the park!
Happy Stamping!!!

Sunday, July 27, 2008

Brooke's frame


Last night I started working on this frame for friend of mine who had a baby girl last month. I'm finally able to connect w/ her, and wanted to make her daughter a frame for her room.


When I talked to my friend, I asked her what Brooke's room colors were going to be once her room was finished, and she said pink, w/ green and yellow flowers. So, I used those colors when designing this frame.

The flowers are punched out of Barely Banana, w/ Regal Rose centers. The green stem that connects her letters and in the corner, I drew on Mellow Moss, and sponged mellow moss on the sides to give some depth. The letters are actually stencils and used Regal Rose marker on Pretty in Pink paper, and then punched out of a 1 3/8" circle punch. I sponged Regal Rose all around the circles, and all around the background paper.

I took a piece of vellum and punched a circular design all along the edges. I wanted vellum to be between the background paper and the name so that the name sticks out and doesn't get lost in the background paper!

The green ribbon is from the Theater pack from SU!. The pink is I believe Pretty in Pink grosgrain. I used an S-clip for some detail.

Thanks for stopping by!
Decorate a frame in your house and make it stand out!
Happy Stamping!!!

Saturday, July 26, 2008

A surprise opening!

This card was done for several reasons! As a lot of my cards are!

1. For the dirty distressing challenge. 2. For the dirty silhouette challenge. 3. Because I needed one for a friend!

So, as you can see on the outside, it looks like a normal card. I did a little paper piercing, a LOT of distressing on the background and edges. Added some hardware. For the silhouette, I stamped and then stamped again w/out reinking to give that silhouette look.


And then..... you flip open that little tab on the front and.........


Wa-Lah! A surprise opening! Aren't I so smart?! Well, I do have to say that I saw this somewhere, and thought it was SO clever! I have wanted to try this, so I put it to use today!

Thanks for stopping by!
Have a stress free day!
Happy stamping!!!

Cupcakes anyone?


This card was made for two challenges. One was a flip card, and the other had to do w/ a cupcake. So, I made a little surprise to go inside the cupcake! A real surprise would have been a real cupcake, but well, I was too busy stamping to bake!
Since this is like designing for Ft. Knox, I won't go into detail, but I really like how this turned out! Now, if you're not imaginative, I'll explain what my mind's eye is seeing! The vellum that has swirls in it is like a dollop of frosting and the mini cupcakes (from Stampendous called Hey There Cupcake!) are like sprinkles. Got it?!
Then, on the inside...... Surprise! There's a BIGGER cupcake! And a perfect sentiment! This is from My Favorite Things Twisted Sentiments.
Enjoy the 3-d cupcake!
Thanks for stopping by!
Eat a cupcake today!
Happy Stamping!!!

From the scrap pile!

This is the last card for the VSN Mini challenge! Boo hoo! I had so much fun! Can't wait til the next one!!!


If you look at the post below, you can piece together where everything came from! I'm not going to rehash that! I have cards to make!!!

I made an acetate sandwich for this card. I used the top layer w/ the punched out circles , and then I put pop up squares in the corners and middle. Then attached a piece of acetate, and then put more pop up squares under the acetate and adhered to the cardstock. I just pierced all around the cardstock in a wavy pattern. No stencil or anything was used. The sentiment is from Curvy Verses.

The first picture is of the card, obviously. The second picture is the sandwich. Can you discern the layers? I wanted to make the flowers float! Hope I have achieved my vision!


Thanks for looking!
Use your scraps!!!!
Happy Stamping!!!

VSN Book Club - July!

Tonight was SO awesome and inspiring!!! I had SO much fun! You all missed a totally great stamping night!

Here are the projects I made:


This was the first challenge. The book was "To Kill A Mockingbird". Apparently it deals w/ The Great Depression. So, we had to use the destressing technique. I use this all the time! I sponge the edges in brown, and then I ran the bone folder around the edges.


This was a SUPER fun challenge! The book that was the inspiration was a children's book called Peek-A-Boo!
I can't wait to make another one of these! This is a suprise pop up card! As you can see what happens when you "pick up" the catapillar.....! Watch out, he might be a woolly one! And watch for jumping frogs!


This one was also really cool! The challenge was to make something Dr. Suess related. Well, the first thing I think of when I hear or see Dr. Suess is The Cat In The Hat! So, why not make a hat w/ all sorts of crazy things coming out?! I did the hat as a 2-5-7-10 bag, and adhered red strips of paper to make the stripes. I stamped the frog from Frolicking Frogs; I drew the plate; the ball is punched in real red using the 1 1/4" circle punch w/ a small star punch; the kangaroo is fromMelanie Muenchinger's set Just So Hoppy, I think!; and I drew the fish bowl and water, the fish is from Artful Inkables stamped on Barely Banana to give it some color. I adhered the entire collection onto a whisk and placed in the "hat"! Purrr-fect!


This last card was done for the Polished Stone technique. The book was Sea Glass, and it reminded the host of sea glass that she would find on the beach, and when looking at it, it looked like polished stone. So....we had to make something w/ the polished stone technique. So, I am calling this card "Stoned Butterfly"! Aptly named, don't you think?!

For the butterfly, I used elegant eggplant and sage shadow reinkers w/ a couple drops of metallic pearl mixative. I stamped the butterfly w/ Black StazOn. The flowers (which I just remembered the name of that fold! It's the Dahlia fold!), are done w/ so saffron, summer sun, and pumpkin pie reinkers.

I get some rubbing alcohol on a cotton ball and then drop some reinker onto the cotton ball. Then, on glossy paper, I just dab and dot my way around and create a design. Then, you spray seal it w/ acrylic sealer that you can pick up at Michael's. And let dry. It takes a while!

I stamped Curvy Verses as the butterfly's flight path and still got a sentiment in there!!! I added some clouds and a leaf to add some detail! This is NOT how I would usually make a card, but I only had 45 minutes to work w/!

Thanks for looking!
Read a book today!
Happy Stamping!!!

Friday, July 25, 2008

Birthday Wishes


Today's card was made for the Limited Supplies challenge. I could only use 4 layers (which isn't a big deal for me!), limited punches, only use ribbon for embellishment. I used Martha Stewart glitter for the cake and adhered it w/ white craft ink. I cut out the candles and flames and attached to the cake.

Thanks for stopping by!
Have a great day!
Happy Stamping!!!

Do you see what I see????


This card was made for the simple challenge as well. Well, yeah, this is SUPER simple! I wanted to work w/ acetate as a major player on a card. Well, I'm not too happy w/ the results as they are too faint to actually see! I knew I should have used a darker purple! DUH! Anyway, I pulled out my Thomas Kincaid stamp and decided to use it w/ Almost Amethyst. It's pretty in real life! And I didn't put any sentiment on there, so it can be used for whatever. If it ever gets used at all! I have no idea where I acquired the green ribbon. It's super pretty though, huh?! I think maybe I got it from a girl who took a trip to Offray Outlet. Oh do I want to go there!!!! I could spend a day there looking at all the ribbon!!!!

Thanks for stopping by!
Have a fantastic day!!!
Happy Stamping!!!

A beautiful Christmas


This card was made for a simple dirty challenge. I decided to pull out my long forgotten A Beautiful Season! I loved this set when I only had a few, and used it quite often. Once I started buying like crazy, it was forgotten! Not anymore! I stamped this image in Basic Brown, the Merry Christmas in Real Red onto Very Vanilla. Ribbon is from Target (although I don't recall buying ribbon at target.hmmmmm.). And I sponged the edges to give it that finished old timey look. Oh, and I versamarked the "snow" areas and then poured on the Heat & Stick Powder and then sprinkled Dazzling Diamonds to give it some sparkle.
If you are on my Christmas card list, look forward to receiving this card from us in December! I LOVE this card! So, therefore, you will be receiving it! Plus, it's super simple to make and easy to do an assembly line on!

Thanks for stopping by!
Have a beautiful day!
Happy Stamping!!!

Happy Harmony!


This card done for a dirty sketch challenge. I chose to continue w/ Apricot Appeal, since that's my new fav. color! Well, of the week anyway!
I used Apricot Appeal, Only Orange, and Very Vanilla w/ a piece from my Prints Pack. LOVE that prints pack! So glad I got another one!

And I wrapped it all up w/a nice piece of ivory taffeta ribbon! I really like working w/ this ribbon! It's so soft and easy to work w/! Didn't my bow come out perfectly?! I wish I could say the same for my ovals, but oh well! I tried. That's all I can say about that!

Thanks for stopping by!
Have a happy day!
Happy Stamping!!!

Thursday, July 24, 2008

Where are you?


This card was made for today's Ways To Use It Challenge: using the negative. We had to find ways to use negative images, or the negatives of chipboard. Well, I had to be different, (surprise, suprise), and I used a cutout of the Pittsburgh skyline as my negative. And I punched out the front of the card w/ my word window punch and wrote on the actual card itself (instead of punching out a window and then writing on it and attaching it on the card). And since the girl is trying to find "you", I put the map upside down (if you look closely, maybe turn your monitor upside down! you can see it's the Golden Triangle!) so as to say that she has looked everywhere, upside down, inside out, sideways, and upways, and downways (do I sound like Mr. Wonka from Charlie and the Choc. Factory when discussing the directions of the glass elevator?!).

Hope you got the message!
The girl is from Going Places from My Favorite Things.

Thanks for stopping by!
Enjoy a Rand McNally map today!
Happy Stamping!!!

Wednesday, July 23, 2008

Apricot Paisley

This card was made for a monochromatic challenge.

I was going through my SU! paper pack, and just LOVED the yellowish paper. After talking to my SU! demo, she said it was Apricot Appeal! Shock and awe! Thought for sure it was So Saffron! Well, I used it anyway, because I don't use Apricot Appeal enough!

Thanks for stopping by!
Paisley is really "appealing", don't you think?!
Happy Stamping!

Filigree journal

So, today's challenge was to be inspired by a beautiful cake! Well, this cake was black and white w/ green fondant ribbon. It really is a work of art!

So, here's my interpretation. I knew most people would make cards, and I have to be different! Plus, I was reorganizing all of my PartyLite stuff. Getting rid of the old, and making room for the new! We have a new catalog, so I had to get ready! Cross your fingers someone has a party this catalog season!

Anyway, back to the project! I had this journal that I was putting some important candle info in, and I really wanted to decorate it, so this was the perfect opportunity!

Here it is! What do you think? Apparently the people over at SCS aren't too crazy about it! But, I don't care, I love it! And that's all that matters, right Jaime! ;)


I used Black paper, and stamped the Filigree background stamp in white craft ink. I poured white e.p. over it, and then added Certainly Celery ribbon for the green ribbon accent. It's very simple, but so was that cake!

Thanks for looking!
Add a splash of celery to your day!
Happy Stamping!

Tuesday, July 22, 2008

Masculine card, you say? Oh my! What a challenge!

This card was made for the third and final challenge of the day: masculine! Another AAAGGgggghhhhhh!!!!! But, I pulled out my My Favorite Things set Let's Hear It For the Boys, and got started! It's very very simple, yet, it gets the message across! I handdrew that window. I know it doesn't look very good. I'm sure my kids could do a better job, but hey, I was the only one not taking a nap, so you're stuck w/ me!


Thanks for stopping by!
Hey! Sit down and relax!
Happy Stamping!!!

Black and White, and "read" all over!

This card was made for another Dirty challenge: have lots of white space! AAAAgggghhhhh!!!!!! I don't like a lot of white space! I feel like I need to fill it! I don't add a lot of layers to my cards, but I do like to fill it up!

So, this was TRULY a challenge for me!

Thanks for stopping by!
Don't look at the world as black and white, look at the shades of gray in between!
Happy Stamping!!!

Pomegranate Roses

This card was done today for a Dirty Girl challenge: Watercolor. Since I only know how to watercolor roses from Roses In Winter, I stuck w/ that!

Here's how it turned out! I did change the middle from my usual Label Classics and stuck a metal tag in there instead! Turned out ok!

Thanks for stopping by!
Have a rosy day!
Happy Stamping!!!

Monday, July 21, 2008

Rain or Shine

This card was made for two challenges today. Today is Tuesday, which means it's Color Challenge Day! Today's color combo is Soft Sky, River Rock and Very Vanilla. Very nice combination! As I was perusing the Forums page, I scrolled down to My Favorite Things to see what was going on there, and lo and behold, there is a sketch challenge! And, you could win a free stamp set for the August release! Woo hoo! So, I decided to combine the two and this is how it turned out.....


I'm really liking this card! What do you think?

Thanks for looking!
Gray skies are gonna clear up, put on a happy face!
Happy Stamping!!!

Two challenges in 1


This card was made for yesterday's other challenge: ribbon. And it is also a sketch challenge.


I bought this ribbon w/ lots of others to give in little tins to my friends for coming to my SU! party and for our swap. I had some left over, so I just stuck it in w/ my other ribbon and promptly forgot about it! Until last night when I finally got back to my computer and saw the ribbon challenge. I went through my 12x12 paper and found a cool design and then found the perfect ribbon to achieve the same look! Because what was on the paper was WAY too big for my little card! So, I improvised. It's not the best card in the world, but it works! I'm still trying to claw my way out of my slump. These couple cards that I have done are NOT my best work!


Thanks for looking!
Happy Stamping!!!

Second try....


Here's another card I made w/ vellum. I took it in a totally different direction and didn't make a scene! It actually looks better and softer in real life. The evening light didn't do anything for the picture!

What do you think?

I used metallic cardstock, vellum that went through a cuttlebug (ouch!), more metallic paper, and some vintage Old World stack cardstock. I added brads to connect everything together and to get the vellum on there! I didn't want to squish the vellum by going through the xyron like I did w/ my last card because of the embossing. The sentiment was typed and printed out. It's size 12 and I can't remember what font. Very pretty though! I made it pink to tie in the pink layers. I also added crystal effects to the large greenish square and sprinkled some dazzling diamonds for some pizazz! And did some paper piercing. I thought I was going to faux sew, but it didn't work out that way. Bummer.

Thanks for looking!
Say hello to a "brad" today!
Happy Stamping!!!

Drive Me Wild!


This card was made for another challenge on Splitcoast: Dare To Get Dirty. If you're a fan club member, you can do the challenges.

For this first one, we were to use vellum. So, I made this card. It's not perfect, but I like how it turned out! It looks like the monkeys are flying on those vines!

Since we have to be tightlipped about everything having to do w/ the Dirty Dozen, I won't go into any detail.

Thanks for stopping by!
Watch out for those flying monkeys! And their bananas!
Happy Stamping!!!

Masculine Birthday card


I took a week off of stamping to kind of relax and get excited about stamping again. I was so overloaded w/doing that basket in such a short amount of time, I exhausted my brain! So, now I'm back, and what a week to come back to! There are the daily challenges on splitcoast as well as Dare to Get Dirty challenges that you can do if you're a fan club member. I am, but only because I don't want to miss anything! And I get automatic uploading capabilities so my projects don't need to be approved first before they are viewable. Just one of the perks.
Today's card was done for the Try A New Technique challenge. We had to incorporate 3 challenges into 1! Baby Wipes technique with a sketch challenge and a color challenge of only using Bravo Burgundy and Creamy Caramel.

Well, since I have a ton of reinkers, I found Bravo Burgundy and Creamy Caramel in my mix, and put a couple droplets on my folded up baby wipes. Then, I dabbed it all over my cardstock. I did go through a few pieces of cs before I got this background! Then, I started working on the sketch challenge. We had to do 3 circles or 3 something in a row down the card. So, I just used my two biggest SU! circle punches. The stamped images are from Studio G which I found at Michael's in the dollar bins by the registers. I love searching through there! Now I have quite a few, so I have to really think about whether or not I have a certain one! Anyway, so I used two different birthday stamp sets to create this card. I sponged burgundy around the edges of the circles and the main layer. And I added 3 brushed silver brads to complete the look. There had to be something over on that side to balance the card!

Thanks for looking!
Have a fabulous day!
Happy Stamping!!!

Wednesday, July 9, 2008

I love to scrapbook.....NOT!


Today's card is for the Ways to Use It Challenge: Mini size everything!
I instantly thought of my collection of Michael's dollar stamps by Studio G that are pretty much in mint condition because I just like to collect them. I never use them!!! And they are all super cute! I could make a zillion ATC's with them. But I don't like to limit myself to a 2" x 2" card! I need LOTS of space!

Anyway, back to the card! Yesterday, I went to Michael's to pick up 1 thing and I came out w/ 2 bags full of stuff! How does that happen? I look in my basket and it's full! Who puts that stuff in there that I HAVE TO HAVE?! I got some little tins that were already decorated (woo hoo!) for my party and I'm putting a little stamp set in there w/ a spool of ribbon. Just a little thank you for coming and swapping too! But while I was rooting around the stamp bin, I found this cute set that's all about scrapbooking! Well, on my card I have used every stamp in this set! I just had to have it! Now, if you know me, you KNOW I hate to scrapbook. So, why did I buy this???!!!! Who the heck knows! I just had to have it! Maybe it will get me into that scrapbooking mode? We'll see about that!

So, back to the card, again! The striped paper is Brooke Narr Stripe by Making Memories. And to get sidetracked again, I just want to say how much I LOVE this paper! My favorite combo right now is Wild Wasabi and Regal Rose, and both of those colors are in this striped paper! Can't get better than that! And it's not even Stampin' Up!!!! Ok, back to the recipe! The other paper is (surprise, surprise) Regal Rose and Wild Wasabi. I was reorganizing (one of my favorite things to do, because I always find something that I forgot I had!) and I realized I could use my alphabet brads that I bought SOOO long ago! And the heart is a brad as well. I searched through my brads (seriously, I don't have THAT many!), but did not have any number brads. So, I used one of my alphabet stencils that has numbers on the bottom. All the ink is Wild Wasabi. The ribbon is Wild Wasabi double stitched. I have an S-hook that is securing the scrapbook to the card so I don't have to adhere w/ adhesive, which is always a bonus when I can be creative like that! The tag, glue and scissors I cut out w/ just my fiskars scissors (honestly, no big deal to cut these babies out), and adhered them to brads (big brads! SSShhhh!!!!) w/ glue dots. And that's it! Simple, simple card! I seem to really like this layout, as I think I've used it quite a few times! I'll have to come up w/ something cool! Off to search! Oh wait, I have to finish my swap cards! Yes, you read correctly. I'm not done yet! Well, at least the church basket is out of my house! Woo hoo! One project done, another one on its way!

On to the birthday swaps!

Have a great day!
Thanks for stopping by!
Happy Stamping!!!
Or as my new friend says: Stamp On!

Birthday Whimsy Sketch Challenge


Today's card is for the Sketch Challenge on SCS. I found this challenge to be quite difficult! The sizing for one is hard because you can't use big stamps! And after going through several themes, I found that a lot of my stamps are big! Or long! But, I came through and found something that would work!

When I chose the stamp sets Birthday Whimsy and Big Bold Birthday, I did not think I wanted bubblegum type paper. But when I went over to my paper bag, there it was, big and bold and perfect!!! So, I took out the Barbie B-day Polka Dots by Sandy Lion Sticker Designs, and cut it to fit my card. After wasting some paper, I finally got the size I needed for my squares. They measure 2"x 2" for the first layer. The second layer is like 2 1/4" x 2 1/4". It's just a little bit bigger. I used Lovely Lilac for the cake and balloon. I used Pink Passion for the candles and present. The flames on the candles are Summer Sun. The first layer of squares is So Saffron, and the second layer is Regal Rose. I sponged Lovely Lilac around the Saffron because I think it finishes the edges. I'm a sucker for sponging edges! Haven't you known that by now!

Thanks for looking!
Have a whimsically wonderful day!
Happy Stamping!!!

Tuesday, July 8, 2008

And......the finished product!


And here it is, the final project complete! All I need is to wrap it up and put a bow on it! I'm SO excited to give this to SMM! I hope lots of people put their tickets in for this! How can you go wrong w/ 14 handmade cards, 1 journal w/ a matching pen, 1 decorated water bottle, 1 four-pack of tealights, 1 recipe card set, and 1 book of stamps?! HELLO!

I am going to make a congratulatory card for the winner to find when they open the basket that has my information in it. This way, when they have used up all the cards, they can call me and I'll make them a whole new set! And they can tell all their friends and family about the great cards that I made and then maybe they will call me and want some of their own! Well, a girl can dream!

Thanks for stopping by!
Hope your dreams come true!
Happy Stamping!!!

Some more baby cards!

These cards are all for the SMM basket, which, I would like to add...IT'S DONE!!!!! WOO HOO!!!!!!!!!!!!

Anyway, here are the rest of the baby cards!
The first one is like the Baby post below. The stuff is all from the Simply Scrappin' Kit. I'm telling you, this card was done in 10 minutes! And only because I have more embellishments and stickers on than the last one!

The second card took longer, of course. I have quite a few punches, and ribbon and all sorts of things going on w/ this one! I have 4 stamp sets on this 1 card! Lovely Letters for the BABY part (stamped in Regal Rose); Fancy Flexible Phrases for the tag; Tag Time for the baby in the corner; and Toile Blossoms for the background on the Regal Rose. I used Regal Rose and Wild Wasabi, and Wild Wasabi stitched ribbon. I used both square punches, and both tag punches. Embellishments include the ribbon as mentioned before and 2 pink diaper pins!

The third card is from a hostess set Event Full. I wanted to make this super simple, and that's what I got! Not entirely excited about this one, but it was the last card out of 14 total, so my creativity is just not buzzing!

I jazzed it up a bit by using sparkly brads that I think I got at Michael's. I used white and Wild Wasabi. I also used a bit of ribbon left over from the last card on this one. So, it's also using Wild Wasabi double-stitched ribbon.

Thanks for stopping by!
Have an Event Full day!
Happy Stamping!!!

Baby Boy card

This card was literally made in 5 minutes! Well, when you work w/ stickers, it doesn't take long to make a card! This was made for the SMM basket. I used the Special Delivery Boy Simply Scrappin kit to make this card.


I put background paper on first, then cut the light blue paper to go in the middle. I adhered the BABY stickers and punched a scallop out of Wild Wasabi paper to highlight the first B because it's the same color as the light blue paper and would fade into it. I put down sticky strip on the top and bottom of the light blue paper. Then, I put down orange ribbon. I adhered some stars for some added detail and this card is finished!

Thanks for stopping by!
Have a star-filled day!
Happy Stamping!!!

Journal and Pen set


This journal and pen set was made for the SMM basket that I am almost finished w/! I was going to decorate a planner, but I can't find them in my craft room! I found a stack of journals instead, and decided to decorate a journal and have a matching pen! I think it turned out ok?! The only thing I don't like about it is that it doesn't go to the binding. So you can see a little green peeking out, but until someone comes out w/ a punch for this type of binding, then I'm out of luck! Oh well!

I took Very Vanilla and stamped my French Script background stamp about 4 times to cover the entire piece, in Black Memento ink. I took my Martha Stewart bone folder and roughed the edges all along the vanilla paper. Then, I sponged Basic Brown all around it and over the vanilla.

I stamped Lovely Letters in Black Memento ink onto very vanilla, and punched them out using a 1 1/4" square punch. I punched black paper w/ my 1 3/8" square punch and layered the squares. I knotted some brown ribbon and taped it in the back. I took the whole piece of Very Vanilla and ran it through my xyron 900 to make the whole thing sticky and hopefully will be less likely to peel off after use! I ran the letter squares through my mini xyron and stuck those on. I stamped the two flowers from Garden Silhouettes in Black Memento ink just to add some decorative detail.

For the pen, I cut a piece of vanilla, and stamped it w/ French Script. I sponged Basic Brown all around the edges, and stuck it inside the pen!

Thanks for stopping by!
Happy Stamping!!!

Sunday, July 6, 2008

Mirror, Mirror On The Wall....Who's the Fairest Of Them All?


Today's card was done for the Try A New Technique Challenge on SCS: Suspension Cards. This was a really fun card to make! I was looking at all the gallery submissions when I thought about doing this and I just ran w/ it!

I used Basic Gray for the card itself. I stamped flowers from Toile Blossoms as a background w/ Black Memento ink. The guilt frame is a metal sheet that I stamped w/ StazOn so it wouldn't smudge or dry off. The evil witch was found on http://www.disney.com/ and under archives. I wrote the sentiment on parchment paper w/ a quill and Real Red reinker. I tried to make some droplets of blood on the sentiment, but it doesn't look like it turned out! Oh well! I bought that parchment set a couple years ago when visiting DC. I never had to use it until today! I ran the two strips through my Xyron so they were sticky on the back, but I didn't want anything to show through!

I stamped Snow White on Very Vanilla and colored her in. I sponged and dabbed Basic Gray around the edges to match the card. I put dental floss between the two ovals to make them spin better. It works better than thread. The two ovals are stencils.

Thanks for stopping by!
Hope there's not an evil witch lurking in your mirror today!
Happy Stamping!!!

Peach water bottle


This bottle was made for the SMM basket. I wanted to decorate a water bottle because I just love decorating water bottles! And just something different to add to the basket of cards!

Now to rack my brain on what else I could put into this basket!!!! Hmmmm...... well, we'll see what else I can come up w/!

I used Le Jarden designer paper and Sun Ripened for the peach image. The colors I used for the peach are: More Mustard, Apricot Appeal, Mellow Moss, Always Artichoke, & Chocolate Chip. I used Mellow Moss and Always Artichoke w/ a scallop punch of More Mustard that I ran through my Xyron. I stamped a flower from Carte Postale on the Mellow Moss for background.

Thanks for stopping by!
Have a "peach" of a day!
Happy Stamping!!!

A walk through the forest....

This card was made for the SMM basket. I have been wanting to make a pink tree ever since I saw a card on SCS that used pink instead of the traditional green for Lovely As A Tree. I love that card, and I have it in my head, but I don't know who made it, and I can't remember when I saw it online!

When thinking about what stamp sets I would use for these cards, Lovely As A Tree was the first set written down! I LOVE this set! I know, it's a bunch of trees! But, I have created quite a few different cards using this 1 set!!! That's what I love about SU! and other stamp sets from other companies. I usually only buy them if I can use more than one stamp more than 1 way! I'm a versatile stamper, so my stamps need to be versatile! And Lovely As A Tree is one of those that can be used in MANY different ways!
Ok, on to the good nitty gritty stuff! I stamped the tree in Regal Rose, and then stamped on top of it in Versamark. Then, I poured Heat & Stick Powder, heated and then very lightly sprinkled Dazzling Diamonds on top. I stamped the "forest" behind the main image, and then put sheer pink ribbon around and that's it for this card!

The second card I made also uses Lovely As A Tree, and I don't know if I like this card. I'm afraid to put something on the top of the card. I love my clouds that I made! I don't want to hide them! There are some boring cards at Hallmark, that have less than what I have on my card! So, this is it! This could be a male card! No bling, no shiny stuff, no ribbon! I used my cloud mask and sponged clouds. Then I took Wild Wasabi ink and sponged grass. I got my aquapainter out, and made some grass and defined the hillside. The sentiment is from Fancy Flexible Phrases. The tree was stamped w/ Garden Green and Choc. Chip. I sponged the inside of the tree w/ Wild Wasabi and Close to Cocoa. The layer behind the main image is Choc. Chip.


For the last card in this collection, I used Friendship Blooms. This card isn't one of my favorites either, for as much as I love the set, I'm not so hot about this card. Oh well! It doesn't look bad, it's just not what I envisioned.

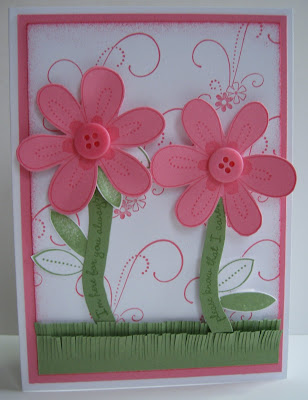
I stamped w/ Regal Rose onto Regal Rose paper and cut out the flowers. I stamped the leaves in Wild Wasabi. I stamped the swirls w/ Regal Rose. I stamped the sentiment 'I'm here for you always, please know that I care' from Curvy Verses and cut them into stems. This way I don't have to make room for my sentiment! I love when I can do that! I cut out Wild Wasabi and cut grass out.

Thanks for stopping by!
Have you enjoyed your tour of the forest?!
Happy Stamping!!!

Friday, July 4, 2008

It's Like Comparing Apples to Oranges....I mean Cherries!

This card was made for the SMM basket. I was still working w/ the Tart & Tangy set w/ the matching Designer Paper! I LOVE this stuff!!!


Anyway, the paper is Tart & Tangy D.P. and whisper white. I used Tart & Tangy and Fancy Flexible Phrases. I used red ribbon as an embellishment. I used quite a few punches on 1 card! I'm proud of myself! Here is what I used: scallop punch, 1 3/8" circle, 1 3/8" square, 1 1/4" square, word window, and hole punch. Whew! I think I got them all! I used big metal brads to add some detail. This is the first card that I have used these for! I even have bigger ones, but figured these would work best! And my beloved pop up dots! Can't make a card without them! Well, I can, but it wouldn't be very interesting!!!

And.... I added a cherry to the envelope to tie it all together! Just had to!


So, I was still messing around w/ the Tart & Tangy set w/ the Designer Paper and wanted to use the apple. The apple was the only stamp I had not used in this set! I just HAD to ink it up!!! I figured the color in the d.p. was Always Artichoke. I cut the papers and adhered them to the card front. I put a layer of sticky strip down, and then layed my red ribbon down for a vibrant separator. I stamped the apple in Always Artichoke and then punched them out w/ the 1 3/8" circle punch. I stamped and cut out the Real Red apple and stuck it to the corner, because I didn't center my sentiment enough before I started writing! Ooops! So, I had some extra room at the end! Anyway, I sponged the edges of the circles, and then adhered to the Real Red scallops that I hole punched each loop to add some detail! I added an apple to the envelope to match!

Thanks for stopping by!
You really can't compare apples to cherries!
Happy Stamping!!!

Recipe Cards...Finally!

Ok, I finally took pictures of my recipe cards, so they finally made their way to the blog! I made 4 of each type of category.

The first one is Dessert! Because you have to start with dessert!!!

I stamped the recipe card and dessert image in Chocolate Chip. See, you're already thinking about that chocolate you've been hoarding!!! And then I just filled in the icing w/ Regal Rose.

The second is Vegetables, Sides and Salads.

I stamped the main recipe card and veggies image in Garden Green. Fitting that it should be Garden Green! Haha! Get it?! Although, looking at the picture, I really don't know why that avocado is part of that?! Maybe I colored it wrong?! What about broccoli, a bowl of mashed potatoes, a side of french fries?! Oh well. Whatever! The other colors I used are: Pumpkin Pie, Real Red, and Close to Cocoa.

The third set of cards are Breads.

I stamped the main recipe card and image w/ one of the current SU! In Colors that will be retiring when the catalog finally bites the dust in a couple weeks: River Rock. I don't know about this color. I have mixed feelings about this color. But, it works for this, so it's perfect!

The 4th set of cards are Soupds, Stews, and Sauces.

I stamped the main image in Basic Black. For the pot image, I used my markers to get the Real Red on there as well as the Basic Black. I added a little Going Gray to the edges of the pot to give a little depth so it doesn't look flat.

The 5th set is Miscellaneous.

I stamped the main image in the In Color Purely Pomegranate. The image inside was stamped in Basic Black and just used all kinds of colors, whatever was called for! There's some Green Galore, So Saffron, Really Rust and some others.

The last set is Meats & Main Dishes.

I think I stamped the main recipe image in the In Color Blue Bayou. The picture was stamped in Basic Brown, and colored in. Interesting image, tacos. I mean, I love tacos as much as the next person, but seriously, why not a roast or something? Hmmm..... Oh well, whatever!

Thanks for stopping by!

Have a delicious day! And go eat some chocolate!

Happy Stamping!!!