Saturday, February 12, 2011

Rear View Mirror Thank You's

My cousin, Gina, who is getting married in a few weeks (I can't believe it's only a few weeks til the BIG DAY!!!!), and she is having me create her rear view mirror thank you's.  These thank you's will go to the valets and after the reception, when the valets bring the cars to their owners, they will slip one of these on the rear view mirror as a final token of thanks.  It says, "Thanks for sharing our special day with us!  Safe travels! Love Gina and Michael".

To create this lovely thank you, I took Rich Razzleberry c/s and ran a slim piece through my cuttlebug w/ the Tim Holtz Paper Rosette die.  Then, I created the rosette.  I punched two pieces of Rich Razzleberry w/ the 1 3/8" circle punch (SU!), and put on both sides of the rosette to hold it in place.  I let those all dry for a few days.  Ok, a week!  Now that they are properly dried and ready to go, I am now finishing the fronts.  The other wedding color is Tempting Turquoise, which I used to punch hearts from my SU! punch.  I took SU! clear heart buttons and stitched one on each heart.  I took Very Vanilla and punched out two swirls each.  Then, I created the verbiage and printed it out w/ purple ink.  I die cut each section w/ the Spellbinders Fancy Tags.  And now I am adhering all pieces to each rosette!  Fun!  For all 75!  LOL!


And since I don't have a zoom lense, you can't see a clear view of it, but you can get the jist of it!
Have a great day!

Sunday, February 6, 2011

Baja Breeze gift certificates


 I have been asked to make gift certificates for my brother's girlfriend.   She and her mother own a spa, and they asked me to create some gift certs to give out to their customers.  I was asked to make long ones that open up like a card, and short smaller ones that are one sided.  The first pic is the long one.  Clearly....!

 I used Baja Breeze, white and Kraft as my color scheme.  The stamp sets used are Toile Blossom from SU! and the bottom stamp border is Vintage Borders by Nina Brackett for Gina K. Designs.

 I incorporated the same sets and colors for the short/small version as well. 
This is a close up of the short/small version.  I cut out each hole to dress it up a little since I couldn't add any embellishments.  I only had to make 20 of these (and 20 of the long version).

Have a great week!

Friday, February 4, 2011

Wedding treats!

I am SO excited for my cousin!  She is getting married next month!!!!!  We are 1 year apart in age, and actually grew up in two different states, but we have been close since we were little!  Thanks to our moms!  She was in my wedding and now I have been asked to be in hers!  I am so happy that she has found the love of her life, and is starting this new chapter of her life with him! 
She knows that I am crafty, and has asked me to create several things for her wedding!  This blog post only features the first item.  The other items aren't quite finished yet!

The first item is a little mint pouch!  I made 50 of these for the hotel bags.  You can see all of them in the first picture here.  Her wedding colors are Tempting Turquoise and Rich Razzleberry.  She isn't a stamper, but after showing me these colors, the SU! colors matched PERFECTLY!  How divine!
I created little tags that say, "Mints for your pillow!  Sweet dreams!"  I created them using the fancy tags from Spellbinders Nestabilities, and the Large Oval punch.  It fits perfectly inside this particular die!


Other blog posts to follow as I complete each project!

Ms. Organization!

I like to be organized.  That is not always the case, but I like to TRY to be!  I am now working with my dad and two other individuals in a company that my dad has created called G.R.I.P. Solutions.  Right now I'm working with our webdesigner to build a website to display and sell the products that my dad has created.  All of these products are created/invented w/ disabled people in mind.  However, I have a few products at my home that I use, and there's nothing wrong w/ me. 

Here is our website:  www.mygripsolutions.com  It's almost complete!  We are waiting for a new banner that will take our site to a new level!  Feel free to explore the site!  I have the G.R.I.P. Pad and use it on my lap when stamping in front of the tv.  I also use the G.R.I.P. Pad in my car to hold my purse in place on the front seat when I slam the brake pedal too fast!  I also use it for long trips to hold the dvd player in for the kids in the middle console.  Once it's on there, it doesn't move!  And then I use the G.R.I.P. Pad whenever I go stamping.  Sometimes when you're working at a table that gives when you bear down on your stamp so only half of the image shows up on paper?  Well, I put my G.R.I.P. Pad down on the table, followed by my Stampin' Up! self healing mat, and then my paper and stamp, and it makes a perfect impression every time with the added support of the G.R.I.P. Pad!  The nice thing too about the G.R.I.P. Pad is that it comes in different sizes and colors!  Get yours today!  ;)

Since this is a serious product line, and we have a serious future ahead of us, I wanted to start with my best foot forward.  I try to take advantage of the opportunity to create something instead of just going out and purchasing something that I'm just ok with.  Why not create something that you are totally in love with?  I needed a binder of sorts to hold important documents, my notebooks, and any other important material needed to get my job done or have on hand if needed.  I searched my stash of office supply items and found some plastic manila folders.  I bought these by mistake several years ago for another organizing project, and just kept them, knowing that I would eventually use them for something else!  And that time had come!  I went through my SU! dsp and found Love Note that I fell in love with!!!  Grabbed some Tim Holtz stamps and other companies stamps and went to work!  Working w/ 3 colors really made it quick and easy to create this binder!  After the pages were cut and designed, I ran them through my sewing machine to create pockets.  I would advise using a strong needle for this!  On the very last pocket, I actually broke my needle because it was fighting w/ the plastic folder!  Not my most brilliant moment!  But, I'm still a novice when it comes to my sewing machine, so I'll chalk it up to, "I just didn't know!"

Here's the front:


 I used Tim Holtz and Kitchen Sink Stamps roses to create this little collage.


This is just showing the pocket.  For the rest of the pages, just the bottom is stitched and the side by the rings is stitched for reinforcement.
I used MFT stamps and dies for the top part of this page.  Nesties and inkadinkado stamps for the middle.


 Here's a close up of my MFT banner!

 Some of these are Tim Holtz and some are unknown.  I can't remember the brand of stamps that I used...

 I used Tim Holtz and Inkadinkado stamps here.  I used a martha punch and some lace behind it to anchor my centerpiece.  When I stamped the wings, I thought they were bird wings, but then I realized that I have always looked at that stamp upside down!  It's actually two baby angels holding hands!  Isn't that so sweet?!
 You can kind of see the angels better here...  But not much.  The nice thing about doing the rings to hold the files in place is that I can add to it as needed!

And this is what it usually looks like w/ all of my stuff in it!  LOL!  I feel like a real business person instead of a stay at home mom!  And THAT feels GOOD!  :D

What a wonderful friend I have!!!

I have some of the best friends in the world!  And my friend Justine is one of them!  We have a few things in common, and the rest is just entertaining!  We met on the Paper Craft Planet site a couple years ago, and became fast friends!  We share a fabulous and wonderful friend in common, Karolyn, and the three of us get along like long lost sisters!  I have actually never met either one of them in real life, but thanks to wonderful technology, we have been able to skype, and actually see in real life what the other looks like!  Hahaha!
Anyway, earlier in January, Justine had a small hospital stay, and Karolyn and I sent her flowers.  To thank me, she sent me not only a card, but a small treasure trove of embellishments for my vintage cards!
Because I'm like a kid at Christmas, I opened it all up before I thought about taking a picture of it first!  So, the picture that I have below is after I have opened it and looked at everything!  She had a really nice bow, and the one I have on here is not so nice!  But, the package itself is so pretty!  And oh my gosh, the treasures inside!  I will definitely be hoarding these lovely items forever!  Ok, I MIGHT use them! Maybe for Justine and Karolyn!


Thank you SO much Justine!!!!!!  I LOVE it all!!!!!!!  Maybe you'll see some of these things on that recipe box I promised you at Christmas!  You might get it sometime this year!  LMAO!!!!!  ;)

Saturday, January 22, 2011

MINI VSN!

Last night was MINI VSN!  I like to participate in these when I know about them!  They are only held a few times a year.  I was a hostess several VSN's ago, and had a great time!  I love VSN because you get a challenge at the top of the hour, and you only have 45 minutes to create something.  The ladies that hostessed last night came up with GREAT challenges!  I really had to think about what I wanted to do and think about what I had in my arsenal!  If you would like to participate, you can find all of the challenges HERE!  You still have until Monday evening I think to upload your creations! You'll have to go there for complete challenge information.
 I was still making dinner, so I missed the first challenge.
 So, the second challenge was to use hearts as a base.  I asked if we had to make a card, and the answer was no!  So, I created a hanging heart! "Shower My Love To You"


This luminary was the third challenge!
 This paper pieced card was the fourth challenge!  I'm currently working on a project w/ these papers, so I just used scraps, and it turned out well!  I think so anyway!


This is the entwined fifth challenge!


And, this is the sixth and last challenge of the MINI VSN!

Fun fun stuff!  This was the perfect break and now I can get back to work on the projects that I need to finish NOW!
Have a great day!

Friday, January 14, 2011

Warm Thanks card

I made this card for the Kitchen Sink Stamps 10 minute challenge this week, and then after completing it and searching for the keyword, I read the directions again and didn't follow a single direction!  hahahaha!  Well, I have had this idea for a while, so I made it anyway!  I want to make about 20 of these at some point for Christmas thank you's.  I have a ton of things to do before I can get to these cards, though, so....  hopefully they will get done before the snow melts! FOTFLMAO!

I used Kitchen Sink's Invisible Snowman.  This card took about 15 minutes because I had to cut the circles and scallop circles out.  And the ribbon was not cooperating!  It's a long card, to fit those types of envelopes for the picture greetings that normal people send out.


Stay warm!

Sunday, January 9, 2011

Bluebonnets


I am STILL working on Christmas gifts!  This card is one of 10 that I made for my brother's girlfriend for a Christmas gift.  She's in college, but I figured she could use a set of notecards for whatever.  I love leaving the insides blank and not making them specific.  That way there's more versatility and the receiver can use them for whatever they want.
The images are all from Kitchen Sink Stamps.  I used the Multi Step Ivy and Multi Step Bluebonnets.  The butterfly is in the Bluebonnets set.  I found the pack of cards at Michael's and I will definitely be getting more of these to use for gifts!  They are the perfect size, and they come w/ envelopes which, for me, is always a challenge!  For some reason, I run out of envelopes like they are going out of style!  And I have a whole bunch of envelopes that fit regular sized Hallmark cards, but holy moly, my cards are TINY compared to the Hallmark cards!  Maybe I should make mine bigger.....
Have a great day!

Tuesday, January 4, 2011

Christmas Letter Press boxes

Just to warn you:  This will be a long post!

For Christmas for my cousins, I decided to decorate two boxes.  These are no ordinary boxes!  They are actually boxes that held wooden/metal dolls w/ clothes that attached magnetically.  Like paper dolls, but w/ magnets.  My older daughter received a set for her birthday, or last Christmas, and we have been moving the box upstairs, downstairs, everywhere!  And one day I was looking at it, and it dawned on me that it looked like those boxes that are oh so famous that people are redecorating each little cubby!  Like THIS for example!  My youngest daughter got a set for Christmas this year, and I used hers for the other one!
They were originally pink, and I spray painted them white, and then black.  Then I sanded down the edges a bit to give it that worn look.

Here's the first one I made:

 And there are two boxes that I had not finished when I took this picture.  I can't remember why I took it unfinished!  UGH!  Anyway, the one above the boxes had a stamped tree (from KSS Pine Trees), train (from MFT's Cuddle Up Carter), and I drew a train track to go underneath the train.  I think there was a teddy bear too from SU!.  In the top box, there was just holly and berries, both from KSS Holly & Mistletoe.
 The bells are from Kitchen Sink Stamps 3 Step Bells. I used red seam binding that my sweet friend Karolyn sent to me!
 When I look at this box, I start to think about that song, "...brown paper packages tied up w/ string, these are a few of my favorite things!"  I took 3 small wooden blocks from my SU! block pile, and wrapped them up w/ brown paper from a paper bag.  I used thread to tie them up, and glue dots to keep them all together!  The tree is from a piece of 12x12 that I cut out w/ my exacto knife and adhered directly to the side wall, and popped out from the back wall.  That "wallpaper" was pretty busy, and I wanted my tree to look more realistic.
 This is my favorite box!  I drew the fireplace, roaring fire, and mantel.  I used that famous Martha punch for the greenery on the mantel, as well as the red wreath.  I cut out stockings and glued white flocking on to make them look more like stockings.  For the greenery on the mantel, I wanted it to look like white lights, so I added white/translucent beads.
 The snow is falling!  What large flakes there are!  LOL!  These lovely snowflakes are dies from My Favorite Things and Nestabilities.  I adhered them to fishing line so it is supposed to look like falling snow.  And the flocking at the bottom is supposed to be already fallen snow.
 I made the sled!  Can you tell?!  Doesn't it look awesome!  I'm so proud of that sled!  I added some white flocking so it looks like it was just out in the snow!

 I didn't know what to do w/ this box, so I stamped a bunch of things and put them in here.  All of these stamps belong to the set Kitchen Sink Stamps Build A Garland.  The music in the background is actually tissue tape from Tim Holtz.


And here's the second box I made.


 I cut out the stocking, and made it like the ones in the other box.  The ballet shoes and sucker are from an SU! set that has long since retired.  Buttons, Bows and Twinkle Toes, if I'm not mistaken...

 This is the holly and berries from Kitchen Sink Stamps Holly & Mistletoe. 
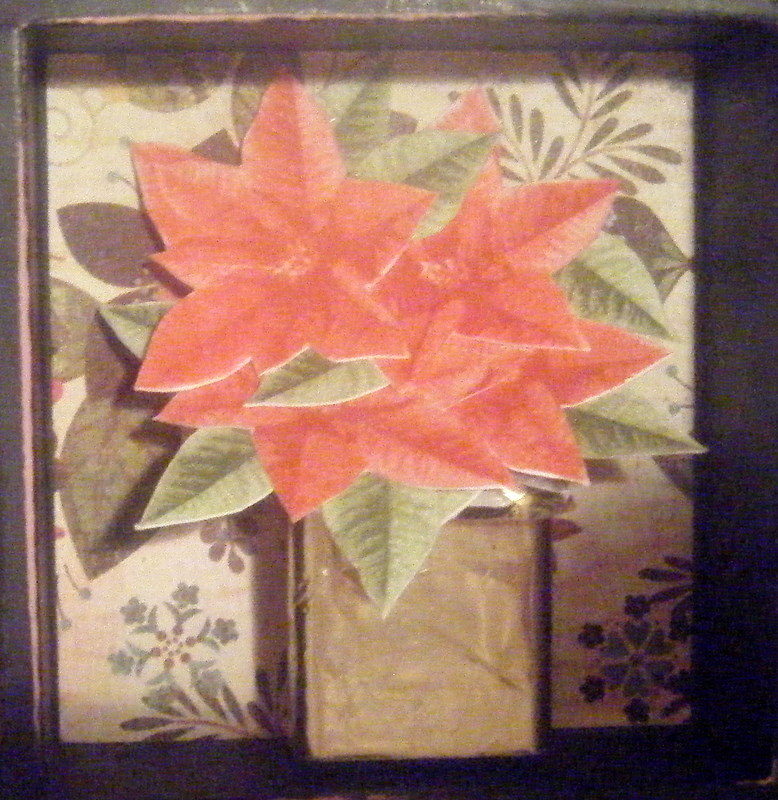
 This is supposed to be a poinsetta plant.  Does it look like it?  The box is a wooden block from my SU! collection of blocks.  I covered it in gold foil that is actually covering my real (fake) poinsettas that I have on my porch!  Then I stamped the poinsettas from Kitchen Sink Stamps 3 Step Poinsetta.
 The greenery is from Kitchen Sink Stamps Build A Garland.  The lights are from a mini Christmas SU! set. I colored them w/ Copics.  I made the two packages myself, and used seam binding ribbon for bows.  I used wire to connect all the lights together.  Does it look real?
 The angel wings are actually butterfly wings turned upside down.  I ran them through my xyron and applied white flocking.  Then, I used a glue pen and went around the edges and applied 24k gold sparkly fluff to the edges and on the box so it looks like gold dust is following in the wake of the wings.

This last scene (I love creating scenes!) was actually the first box I did!  I love the family decorating the tree!  That stamp will be used A LOT!  I just know it!  Both that image and the sentiment are from Welcome Christmas by SU!.  The teddy bear and tea set are from Buttons, Bows & Twinkle Toes from SU!.  The greenery is from Kitchen Sink Stamps Winter Cardinal and the bows are from Kitchen Sink Stamps Build A Garland.

All the paper I used:  Jovial by Basic Grey; Christmas by Me & My Big Ideas;  & Evergreen by K. & Co. (old).

*Each link for Kitchen Sink Stamps goes directly to the set mentioned.  The My Favorite Things are just to the main site.  There's a glitch right now w/ the site.

Thanks for stopping by!  Have a great day!

Sunday, January 2, 2011

Christmas Charger Plate

 Hi there!  Happy New Year!
I have a few projects to share over the next couple days.  I made this charger for my parents in addition to the gift cards that we bought them for Christmas.  I was blurfing a few weeks ago, and found this cute Altered Charger idea on Arlene Cuevos' blog. I purchased a set of 4 gold chargers at Target and got to work on Christmas Day! 

 The pine all around the edge is a stamp from Kitchen Sink Stamps from Winter Cardinal.  I stamped in a circle and after stamping all the parts to the pine (4 separate images to make 1 full image) x's 10 times, I cut it all out.  I actually took these pics of the kids on Christmas Eve and just printed them out on regular cardstock.  I layered them, added some background paper, a few ephemera items and went to town w/ my glue!  The ribbon is sparkly ribbon from My Favorite Things from last year maybe?  I don't know, I've had it a while.
Have a wonderful 2011!